Home Tour: The Kids’ Hallway

Anytime you bring your family to a new place to settle in, I think it is so important to bring your own character and breathe some life into a space. I’m learning there are many creative ways to elevate a basic, builder-grade home to something seriously special. The home market is interesting right now for new builds. The character and uniqueness in projects that we value in shows on HGTV like Fixer Upper or Property Brothers are often out of reach for most of us, hence our DIY-obsessed culture. In our first home, we jumped in and started sanding cabinet doors and painting within hours of closing and this time was no different. Making our house something more than paint on the walls makes me feel all kinds of feelings. I talk a lot about how I grew up, and doing work- doing it ourselves- was something we just always did. It has empowered me and inspired me to learn and make changes that up the ante in the homey game, and also helps to set us up for an increased property and resale value when we decide we’re ready to move again. The work we did on our first home was worth every challenge when it sold the first day it showed. Felt pretty validated after that.

One of the ways I connect with my Dad is doing projects. And making at least half a dozen trips or more to Lowe’s and/or Home Depot in the process. We decided not to travel for Thanksgiving this year, and with my brother in Alabama with his wife’s family for the first time, my parents tripped down to Charleston for a few days! It was my Dad’s first trip to see us, so naturally I put him to work. And my poor cousin Luke. He can’t ever just hang out with us, he’s always getting put to work too.

The hallway was killing me because of the beige, ugh. And because of this:

IMG_2138

How brilliant. And not annoying at all. Of course no one minds a thermostat stuck right in the middle of the wall. Visible from the main living space and the kitchen. Passed it all day, every day. Can’t hang anything there. Can’t really move it without a huge ordeal. I asked, trust me. It involved a tiny attic space, only a small possibility of moving it, and a big electrician charge. So I was like, I have to hide this thing somehow.

If you follow me on Instagram or Facebook already, you’ve seen this before:

23d0ac3c5d61b24ff76c1cf03eefdd0b
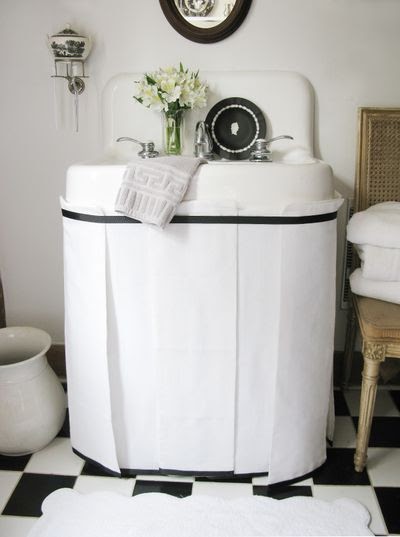
image via Hotel Paradis, Paris

The hallway was a perfect place for paper, and I love love love the birds. The color is killer, and in Charleston it works. This paper is Laguna, by Osbourne & Little, and is “to the trade” only. I found that Fabrics & Paper has it and I can order it there! But the shipping costs more than the paper itself because, of course, it’s in the UK. I have a couple of friends who I know would order this for me. I’m still planning on it, but for now, I’m on pause. Because I saw something else that sparked my interest for the hallway.

IMG_3118

image via Livened Up

Dad was coming, and I was antsy, so I sent him a text of this pic and was like, …can we do this while you’re here!? So we did.

Here’s where we started. I take pics in the dark, whatever.

IMG_2139 IMG_2999

And then it was all:

IMG_3131 IMG_3138And now it looks like this!

IMG_3167

I added a runner too:

IMG_3457And that damn thermostat. While it’s still there, it sort of disappears into the trim, and it doesn’t make me AS nuts anymore.

IMG_3458

I wanted the top trim piece to blend in with the thermostat to help hide it, so that determined the height of everything. We chose select pine for the walls at 3/8″ thickness. For visual interest, the horizontal trim pieces are 4″ wide, and the vertical pieces are 3″ wide. (actual width is closer to 3.5″ wide and 2.5″ wide. I’ve learned that lumber is always a bit shorter than the standard measurements). The top “shelf” is 1×2″ and it the perfect scale for the size of the hallway. Anything wider would’ve closed it in too much. We replaced the baseboards with standard 1×4″ pine and added back the quarter round.

I took my wallpaper sample to Lowe’s and matched the background color almost perfectly to Valspar’s Portico. (note: The pic above has the hallway light on, which is a glass bell shade with an Edison bulb. This is a cool idea in theory, but the yellow cast it gives off is miserable. I’m going to see if I can find a bulb with white filaments instead so the glow isn’t so Halloweeny).

c7451213cb54fd8eef775823c5cc61ce

If you’re a blueish-greenish sort of person, this color is really, really pretty. It pulls a pretty mint color up from the rug in the living room and fits well into the aesthetic of what I’ve got going on here. It coordinates well between the kids’ rooms and doesn’t compete with those colors. Remember when you’re choosing paint colors to consider all the rooms in your house, and how everything will work together when you walk from room to room, what spaces are visible from others, and how it pulls from accents already in those adjoining spaces.

What say you? Yes? No? I love it. But I’m stuck on decor for the walls now. The trim is high enough that I’m not sure I can hang something above it, but that’s really my only option I guess? Send any ideas you have my way!

Have a great Friday and a wonderful weekend!

Home Tour: Rhett’s Room

Well, it’s Monday, but whatever, I can give you a home tour whenever I want, right? Down the hall from Aurelia, is Rhett’s room. It’s a great size room and has come a.long.way. since we first took a peek in here. But, let’s go all the way back to his nursery at Lili Lane. It still hurts a little, seeing his first nursery…

IMG_1411

Mostly because the loss of his wallpaper just about kills me! This was the main splurge in his room (more on the planning and brainstorming of his room can be found here, here, and here). I did get to enjoy it almost a year, but when we moved, I couldn’t bring myself to spend that $$$ on the same paper again.

So this is where we started, and the only shot I had to go on when I started planning his new room from Tennessee.

IMG_2059

This was the previous owner’s dogs’ room/office. And some sort of crazy unknown happenings did awful things to the walls in here. Unbeknownst to me, there would be much patching and sanding in my future. I peppered Joseph with questions, “so when you walk in, where exactly is the other window? Which wall is the closet on? How much space is between the main door and the closet door on that.wall.over.there?!” He was like “….sorry.” Regardless, I started planning anyway. It all started with this shot from Little Green Notebook.

IMG_0071

I was all about this perfect shade of army green, even though Rhett’s room was on the smaller side, I really believed it would work  with two windows in the room.

And here’s where we ended up!

IMG_3418

IMG_3412

This is where I’ve rocked both my tiny babies. This rocker was from my grandmother, and we have put it to some seriously good use. Now look who’s so big rocking himself (nice hair, man).

IMG_3427IMG_3413 IMG_3414

In our wedding slideshow, Joseph chose the song “Forever Young” for his portion of pics, so I just fell in love with this print when I saw it! It’s one of the first things I bought for Rhett’s room, before he was even born.
IMG_3415 IMG_3421 IMG_3429

IMG_3423 IMG_3420I had to bring a little of the woods paper into his room…IMG_3417IMG_3431 IMG_3422

His room is so cozy and full of sentimental touches, just like Aurelia’s Room. I really do love it. I decided to use the Henredon dresser in his room for more storage, and it’s a good thing I did since this littlest one on the way will share this room with him, regardless of if it’s a boy or girl! We are going to do a few touches of blush pink if it’s a girl, and the plans I have for making it a shared room are really going to work well I think. More to come on that, for sure!

Here is a source list for those of you who are interested! Have a great week everyone!

Grey Crib: Babyletto, Hudson

Spotted Crib Sheet: Target

Woodland Friends series prints: holli, via Etsy

Rug: Southeastern Salvage

Roman Shades: Allen + Roth, via Lowe’s (these reviews are bad, but I think they’re perfect for the price, at under $15, you sort of have to expect a little less there).

Tufted Ottoman: Home Goods

Side Table: Target

Orange Plaid pillow cover: Pottery Barn

“Tuck me in tight” artwork: Hobby Lobby

“Forever Young” print: Little Light Prints, via Etsy

Aztec Print Storage Basket: Target

Rhett’s Name Banner: Minted

Bear Rocker: Pottery Barn Baby

Mounted Antlers: High Street Market, via Etsy

Rugby Stripe Tote: The Container Store

Any other questions on stuff, shoot me a quick message or comment below!


Home Tour: Aurelia’s Room

Hello Friday! Welcome to my first tour of our new home: Aurelia’s room! I wanted to start here because it’s probably one of the “most done” rooms so far in the house. And it was the easiest to tidy up for a few pictures. My photography is lacking, sorry. But I’m still really excited to see these before and afters. It’s crazy how much we’ve changed already.

The roller coaster ride of 2014 came to the top on the last weekend in August. We closed August 29th on the sale of our first home. It was a strange thing, to say goodbye to the first home we ever lived in together, but we were at peace about it as well. The next day, we packed the Pathfinder to the hilt and set out, just the two of us, toward our new city. The little ones stayed behind in TN for one week, while we furiously worked all hours of the day and night to get it ready for movers, and to bring our babies to their new house! I can’t wait to share pictures of that week, the demo, our sleeping conditions, it was some of the very best memories, and most fun we’ve ever had together. It was crazy and we hit some huge hiccups and near-misses to get everything “done enough” but it did finally come together.

Within minutes of turning the key in the door the day we closed, Joseph was shirtless and pulling all the carpet out of the house. The previous owner, bless her heart, drove by one last time right after the closing and was shocked, and probably a little sad, to see him already dragging carpet outside before the ink was even dry on the paperwork. But that’s how we do! He started here, in the room that would be Aurelia’s.

ISdobpuy5w0i2y0000000000-1

And here it is today!

IMG_3363

IMG_3345

I debated for weeks what to do about the arched window, and in the end, it made the most sense for us to cover it up. We have a street light on the corner of our property that blazes into this window and it was just too bright at night. And coincidentally, Aurelia stayed in her room and started sleeping through the night again shortly after I covered it.

IMG_3352

I’m still obsessed with the her $65 Craiglist dresser, and the painting that inspired most of her first nursery (more from the artist, here!). This makes me a little nostalgic to see…

102_0385

But, back to her big girl room! Her headboard was a trade-in for one of my first DIY projects, cane chairs in our first dining room. It was natural wood, but I taped off the brass corners and sprayed it with Valspar, Paint + Primer in this pretty mint color. It’s a great shade, probably my favorite right now!

IMG_3365

IMG_3348

Her quilt is an heirloom from my Mama’s sister, Tammy. She gave it to me as a housewarming gift when we bought our first home. It’s such a treasure, and it makes me deliriously happy every time I get Aurelia all snuggled in for bed beneath it.

IMG_3359

I lightly sanded the headboard, but not much. This paint has great coverage! Since I chose a glossy finish, I did four or five coats to even the finish. It took about three days, but was totally worth it.

Her room is missing the banana leaf pattern in a major way. I plan to make a bolster to add to her bed. Isn’t it pretty mixed in?

IMG_3362

In 2010 we were married, and my sweet man planned a once-in-a-lifetime honeymoon to Italy. I bought a vintage-inspired calendar that year of Italian scenes, and I’ve kept it all these years. When trying to decide what artwork to use in her room, I came across this image on Pinterest (sourced here). And you could say it was a lightbulb moment for me. I get really excited about this stuff, ok, don’t judge me!

028954aee2f75e9b96b906fde20a533d

The four prints I pulled from the calendar are places we visited on that trip, which was pure magic and romance, when it was just the two of us. It’s so special to me, and I hope one day she’ll grow to love them too!

IMG_3349

While bifold doors are not my favorite, they actually don’t bother me that much now. They save space actually, and I’m ok with them! I did dress them up throughout the house with new pulls, and these work perfectly in here! Not to mention I found them at Hobby Lobby on sale for $1.99 each.

IMG_3355 IMG_3353

And speaking of Hobby Lobby, I’m not overly into the framed words thing, but this was precious, and perfect for Aurelia.

IMG_3356

I am really happy with how it’s turning out. And one more side-by-side, because those are fun.

ISdobpuy5w0i2y0000000000-1IMG_3345


So there it is!

I always look forward to the weekends so much, even though I’m at home now. I love seeing the kids play and spend time with Joseph. They are so insane over him, and I know they get tired of Mom all day every day 😉 We also do family date night these days. We have found a great babysitter now, so we’ll have more one-on-one dates as time goes on, but on Fridays we usually run out for a fun dinner somewhere, all of us together. Time is short on how long we’ll be able to do this- because I don’t know how we’ll ever go out in public with three children under four years old. But more on that later… Have a great weekend!

Sources below. As much as I can remember at least!

Gold Polka Dot and Striped Bedding: Pottery Barn Teen

Coral sheets and white frames with mats: Target

Tie-top drapes: Pottery Barn (“Cameron”)

Roman Shades: Levolor via Lowe’s

Leopard pillows: Southern Shades’ shop via Etsy

Kids’ table, chalkboard easel, and cube shelving: Ikea via Modernash

Kids’ ghost chairs: Craigslist

White kitchen: KidCraft via Amazon

Striped Rug: RugsUSA

Banana leaf fabric: Tommy Bahama via House Fabric (on sale now!)

Hula Lamp: CB2

Blue and White Vase: Hobby Lobby


Dining Room Reveal

For the past couple of weekends, all I have been doing is working on the dining room.  I keep walking by and I am genuinely surprised every time!  It’s been a half-finished dump zone for so long, and I am now sincerely in love with this space.

I debated for hours on painting it black, then possibly dark green.  But in the end this shade of grey, Flagstone by Martha Stewart, fits into the color scheme of our home perfectly.  To top it all off, I actually pulled my china out of storage.  And I intend to use it!

Before:

102_0290After!

DSCN2405

DSCN2416DSCN2414DSCN2413


And I have a secret too.  You know that sheet set I mentioned before?  This one?

IMG_4695


I pulled that flat queen sheet right out of there and did a little of this:

IMG_2471

And then a little of this:

IMG_2473

The best tip I have for drapes is these little little guys.  So then I added some of them:

IMG_2474


IMG_2475


Then they hang like this!

DSCN2411

Guys, the size of a flat, queen sheet is perfect for a set of double windows.  I love the herringbone pattern (of course), but what I love even more is the relatively short amount of time it took to knock out this project.  Start to finish on the drapes, it took roughly three hours, which can be mostly attributed to a large amount of ironing/steaming to get them looking crisp.  Queen sheets are already hemmed all the way around, so adjusting one side with hem tape is all it took.

I love it!  So happy about my view from the kitchen!

DSCN2421

Have a great Monday everyone!  I’m on the countdown until I get to see this guy’s face step off a plane from Afghanistan:

FH020020

I CANNOT WAIT.

Home Tour: Master Bath

It’s not Friday morning, but it is still in fact, Friday!  So it’s barely, but I made it.  I hesitate to “tour” you around our master bath because it is my least favorite room in our whole house. I wouldn’t necessarily use the word hate, but I don’t love it.  I’ve done what I can for now, until the long-term master bath renovation plan actually comes to fruition.  Maybe in about five years.  Or two….

IMG_2236

Like the guest bath, the master bath also had a sexy wallpaper border and was painted some shade of dirty poop green.  This room required quite a bit of patching where the wall meets the ceiling because again, I’m convinced they probably used some kind of wood glue as adhesive for that border.  It took the top layer of drywall with it in several places.  We had to paint the ceiling too, and that was not that fun.  This bathroom is like door hell.  There are so many of them!

IMG_2237

I added the hardware to the cabinets myself as a “surprise” for Joseph while he was out of town for work (aka, I bought the brass bin pulls in secret and did it while he was out of town so he couldn’t tell me no).  I think he still hates them, but I love mixing finishes.  We replaced the faucets, as well as the light fixtures.  We tackled the light fixtures ourselves, like all the other light fixtures we’ve replaced in the house.  With two people it’s seriously easy- just do some googling.  And turn off the breaker.

IMG_2238

I’m obviously very talented when it comes to photographing light fixtures.  It’s this one:

042665d9-362b-4962-b83f-f36c9655448c_300

Hampton Bay, from Home Depot

IMG_2239

The sink is white, not yellow, I promise.  Not sure what happened there. Two things: 1) Our house was built in 1999, and I’m pretty sure humans were full size then, so I’m not sure why they chose this layout.  a) The tub takes up way, way too much room and b) It has no jets.  c) the shower barely fits my husband, and there is only a sliver of a ledge to prop my toe up to shave.  2) It makes no sense to me why the tub faucet plumbing is out in the middle of the room instead of against a wall- either under the window or there to the right.  Any renovation plan I come up with always included moving plumbing, and changing the window.  Which = dolla dolla bills ya’ll.  My other thought is to leave the current footprint, including the tub, but lay all new tile (to the damn ceiling) and have a new glass enclosure made.

Or, I could remove the tub completely, frost that big window, and do this:

f68ebf5f65be55ea00ad76f6b94e8441

via Chic Design Investments LLC

I spent the better part of an hour gawking at this bathroom.  Oh.Jesus.

DSC02508

Stop.

DSC02530

They managed to make this roof line not look crazy weird.  The paint color slays me.

DSC02545

I have a sample of this exact tile in white and intended to use it in the master anyway.  Couple with subway tile and dark grey grout and call it a day.

prod1669039_F12_cl267041

I love this vanity.  I mean, love.  Not so much the mirror. (Restoration Hardware)

img95b

That’s better. (West Elm)

Our master bath project is a long-time-away-from-now project, but I still love to dream about it!  I love the navy for now because it really works with the color of the tile.  But when it’s time, I will be ready to brighten it up!

Have a beautiful weekend everyone!

Skirting the Sink

I am finished with my version of this gorgeous sink skirt!  I’ve been excited to share with you guys since some of you are thinking about doing this too.  So, remember that great tutorial?  

skirt

That’s where I started.  So to begin, here are a couple shots of our very-hard-to-photograph powder room.  I’m sure a wide-angle lens would be much better on this.  But onto the the before!

IMG_2314

IMG_2312

And a tiny project within a project- DIY chalkboard!  Old frame- plywood cut to size at your local hardware store- chalk paint!  I then took the pieces to Hobby Lobby and they secured the back for me for no charge since I had two or three other things to be framed.

IMG_2315

So here we go with the sink skirt.  I literally followed Eddie Ross’s tutorial step by step.  Except of course nothing went according to plan.  Does it ever?

1. My “flour sack towels” came and they were not nearly as crisp and perfect as Eddie’s.  My towels came and they were sort a cross between cheese cloth and linen.  Instead of buying another big pack and seeing how it went, I just went with it and tried to make it work.

2. Unlike Eddie’s luck, these towels were too long for my sink height.  With some math, and messing around with the width of how they were folded, I needed 5 panels, 10″ in width and 2 small ones at 5″ for the back space near the wall- all at 31″ long.  I wanted the box pleats to be obvious, but not that chunky, so I only overlapped them about an inch.

3.  The wrinkles would NOT give.  I ironed these for hours and almost tossed the whole idea, but I thought it was at least worth a try.

4. I learned to love fabric glue.  It feeds the need for instant gratification. I used it to secure the ribbon on the hem, and around the top.

5. I’m a bit impatient, so I pinned the panels together at their box pleats, and then flipped the whole thing over and pinned the strip of velcro.  One seam sounded like a good idea, but it took some adjusting to make sure the box pleats didn’t fold up on themselves.

6. Is anyone still reading this?  I sucked this time at the “during” pictures.

7. If I had it to do over again, I would buy one cut of heavy-duty duck cloth or other some such fabric and create real-life box pleats.  These towels made things a little difficult.

HOWEVER!!!  I am really happy with the end result!  I may still take the steamer to this thing to work out those wrinkles.  I learned how I think I could do this better next time in case I decide to do this again someday!  So, after all that, here you go:

IMG_2436


IMG_2437


IMG_2438


IMG_2439


IMG_2440


Have a great Thursday!  The week is almost over, yay!

Home Tour: Master Bedroom

We made it through another week, people!  Friday!  Today I bring you our master bedroom.  Like I say every week (at least I feel like I do), there are still things to do in here.  Overall it has the bright, clean feeling that I like.  So here you go: our chambers.

IMG_2232 IMG_2230 IMG_2226 IMG_2227 IMG_2229 IMG_2235 IMG_2228


I’ll source as much I can for those of you who are into that:

Bed and Armoire: Haverty’s (seems to be discontinued, but here’s something close)

Nightstands: Restoration Hardware

Lamp Bases: Target

Lamp Shades: Craigslist (I bought the ugliest pair of lamps ever for $25 to get the black paper shades.  They can go for around $50 each).

Window treatments: West Elm (Discontinued, but they always have great prices and interesting patterns! Also, I hung four panels.  One panel is never wide enough).

Duvet and Shams: Pottery Barn (The large monogram looks dark, but it’s actually a mushroom grey.  All Star Stitches in Lebanon did those for me for $20.  They are the best!  They don’t have a website, but you can call them at 615-444-7110).

Throw Pillows:  Kirklands.  I like the pop of that dark orange, but I’m ready for something with some pattern.  Maybe like this.  Or this.

Prints: All framed at Hobby Lobby.  If you aren’t going there, shame on you.  Their prices cannot be beat, seriously.  And you can always, always get open-back frames for half price.  They literally flip flop the 50% off deal from the ready-to-hang frames back to the open-back frames every other week.  My local guys are incredible.  If something is off even the tiniest bit, they will take it apart and re-frame it for me for no charge.

Paint color: Color match for Pottery Barn’s Mascarpone

I still intend to figure out some way to add some interest to the ceiling in there.  I would love to trim it out like this:3f27d7b16f9c9fd3d42cb467147d3c86

Or this, of course:

33234a2bd22f7f78363dcf35bb623a77


If you have other questions about our master bedroom, or have ideas to share, leave a comment below!

A big thank you to my amazing readers for making this such a rewarding thing to do.  I love writing every day, and usually wake up excited to share.  The encouragement and support from you guys is just awesome.  Have a fabulous weekend everyone!

Home Tour: Upstairs Bath

So, surprise!  We are having a Saturday Home Tour this week.  It was a long, rough week with this sickness that we just couldn’t shake, but I think we are finally coming out of it!  Today I have for you, the upstairs bath.  Sadly, I don’t have a before picture for you.  And I sure wish I did.  Because the walls were sort of this darkish/greenish/poop color, and we had a Texas-star-inspired wallpaper border running along the top of the wall.  This bathroom took the most work on the walls after removing the border, which I am convinced was attached with some sort of super glue.  This meant many hours of patching drywall, sanding, re-patching and more sanding.

There is still a ton we want to do in here, like many other projects we hope to tackle along the way.  Slow and steady as we go here, people.  So, I give you, the upstairs bath:

IMG_2215 IMG_2216 IMG_2217

1. We want to replace the floor:

kitchenafter1_rect540

via apartment therapy

I love painted hardwoods in certain situations.  We definitely want to get rid of the linoleum, asap, and it would be a very affordable update!  I love Good Wood Nashville!  The concept of using reclaimed lumber is such a great way to go!  They “Reclaim. Repurpose. Renew.”  Love that.

2. The vanity situation.  I seriously don’t know what to do here.  It’s really not that bad.  So in my mind we have two choices: a) replace the top with Carrera and an under mount sink, get a new faucet, replace the cabinet doors, and add feet detail so it looks something like this:

7be3e271ba36ae8ae772a0731ca7f250

via Houzz

OR b) get a new vanity/sink.  This is where it’s at you guys:

prod80940_F12

via Restoration Hardware

3. Obviously we need to replace that mirror too.

You know I inherently lean toward salvaging what I have.  So I think that utilizing our current vanity and working on some updates might be a good idea.  But I die over that Restoration Hardware vanity.  Time will tell, my dears!  I just don’t know…

I hope you’re all having a wonderful, cozy Saturday.  We are all snuggled in and cuddling our girl!  See you Monday for our regularly scheduled programming.  Thanks for hanging in there with me!

Home Tour: The Man Cove

Well happy Friday morning to you!  I’m always surprised when it’s Friday again, but oh so thankful.  So.  What is a Man Cove, you say?  Deemed a “cove” by my good friend Erin Souder, it is not quite a cave, you see.  It has three walls and is open to the upstairs hallway.  This room, like everything other room, is a work in progress.  This was my nesting place when we brought Aurelia home from the hospital.  This is a cozy space we like to watch the DVR at night.  It might end up being taken over as a playroom one day, but not today.

So, the Man Cove:

IMG_2206

IMG_2207

This sofa is one of my favorite spots in the house.  This is where I slept for the first few nights of Aurelia’s life, with her bassinet pulled up beside me.  Ok that’s a lie.  For a while I held her all night because I was terrified to put her down.  She weighed about five pounds when we brought her home and she looked too tiny in there by herself.  And, this was one of my first big girl purchases when I had my own apartment.  It’s from Ashley furniture, and considering it was $499, I’d say I got my money’s worth out of it.

That tube tv is just sexy right?

IMG_2208

IMG_2209

Ok does anyone have an answer to the ceiling fan debate?  Probably not, hence the debate.  In my research and perusing, I’ve found that many all designers hate ceiling fans, which I totally get.  My issue is that I hate this fan, but it’s white, so it’s not that obnoxious because it blends in with the white ceiling.  That’s a stretch I know just go with it.  But you can’t deny the excellent nap potential on a summer afternoon with a light blanket and the fan on high.  Ya’ just can’t deny it.

IMG_2210

I know this lamp is awkward.  This whole table situation is a little awkward.  I’d like to find a sharp looking chest to put against the wall.  Not too deep, with a lighter stain, or maybe painted.  We need DVD storage like, in a ridiculous way.  *Note: I find it hard to think about letting go of this table because my brother Alex has it’s mate in his townhouse in Florida.  And it’s super heavy, and I like it.  But it’s awkward right here.

IMG_2211

The chair and ottoman were a Craiglist purchase for $350.  I was ready to haggle them down, but when I got there I could see the sellers really needed the cash, so I didn’t say anything.  Joseph loves his man chair.

IMG_2212

The barrel is a vintage whiskey barrel from Kentucky.  A seller in Hendersonville had hundreds of these stacked in a barn and we paid $75 for it I believe.  And this wall is about to get a big makeover like this:

84895ff6f6efe79665c8daad4ef44fcb

My honey deserves a new tv, and I can’t wait to get him one.  I’d love to get this as our tv stand:

461532_EASELMEDIASTAND_3/4FRONT

It’s been on sale for a while at World Market for $179.99.  I’m in love with it.  I must make this happen!

So, that’s the Man Cove!  Have a fantastic weekend everyone!

Home Tour: The Staircase and Hallway

Hi!  Oh thanks for showing up, Friday!  We all missed you.  For today’s stop on the Home Tour, I want to show you the staircase and what I’m calling the hallway, even though we don’t really have a hallway because everything is open to everything.  You shall see what I mean in a moment.

Unfortunately I don’t have a before shot of the stairs.  But just so you have somewhat of a visual, this is similar to where we started:

6a00e54f8e2c4388330111689060a6970c-320wi

The layout isn’t quite right.  But you get the picture- lots of oak.  So I did a lot of searching and researching and found a few pics for inspiration:

4dab4fcdcf94c006a6d22cfce1b7473f d8f650457a16e3585a1f348b32ade7b4

I was really nervous about doing an all white staircase at first.  So I thought about re-staining it.  I thought about painting the handrail and the newels black.  But in the end, I had to go with white:

IMG_2221

To paint the newels and handrails white, I sanded them all using medium grit sandpaper for the first coat, and then with fine grit before cleaning them off for painting.  They were covered in poly, and it took some work.  And it made a mess.  I used Behr Premium Plus Ultra in bright white, high gloss finish.  Note: I also spent the entire summer of 2011 painting all the shoe mold and baseboards in the entire downstairs.  The shoe mold was unfinished.  I can’t figure out why they decided to leave it unfinished, but it was.  Open nail holes and no stain.  Looked awful.  Because our baseboards are standard size (and while I long for 8″ baseboards throughout the house, it’s on the long list, not the short one) I chose to paint the shoe mold white instead of trying to match the floor.  I know there are different schools of thought on this.  And I know traditionally the shoe mold is considered part of the floor.  But I don’t care.  White looks better.  Per the usual.  This is also a good shot to show you our new paint color.  We are painting (slowly) in sections.  The lighter color where the picture is hanging (original watercolor bought on the water in Venice.  Swoon.)- that’s the new color.  I am over all versions of builder’s beige.  Over. It.  Sorry if you’re into it.  Go for it.  But I hate it in my house.  It is literally everywhere.  Well not for long, you beige.

IMG_2223

IMG_2224

IMG_2218

From our master bedroom:

IMG_2205

From the other side:

IMG_2204

Below is a shot of the area I would love to do a huge pattern of some kind.  I think it would look amazing once the wall color has been changed, to then stencil a large geometric pattern on the walls here.  Just in the staircase.  This is not a place I would consider papering- too much of a commitment:

IMG_2220And finally, the carpet situation:

IMG_2222

Surprisingly the carpet doesn’t make me want to run and scream.  It’s relatively new and I don’t mind it that much.  The color isn’t obnoxious, it doesn’t show dirt or stains, and I’m fine with it for now.  Long term, I’d love to have a big re-do.  Like this:

428709999_FZXZ1I2g_c

But in the meantime, I’m good with my white staircase.  In fact, against the new wall color, which is Sandpiper by Martha Stewart, I love it even more.

If you’re thinking about getting rid of your old oak handrails, do it!  It’s completely worth it.

Happy Friday!  Have a beautiful weekend.